Use a GitHub App to push commits
Harness CI's codebase configuration uses a code repo connector to clone your code, push status updates to PRs, and create and use repo webhooks. If your code is stored in GitHub repos, you can use a GitHub App in a Harness GitHub connector for authentication.
However, if you need your CI pipeline to commit and push changes to your repo, the code repo connector doesn't support pushing to the cloned repo.
If you need a CI pipeline to push changes to a repo, use the instructions in this article to configure a Custom Secrets Manager setup to generate a dynamic personal access token from the same GitHub App used by your code repo connector. Then, you can run your commit and push commands in a Run step using the generated credentials.
Create a secrets manager template
First, create a secrets manager template at the account level.
-
Go to your Harness Account Settings and select Templates under Account Resources.
-
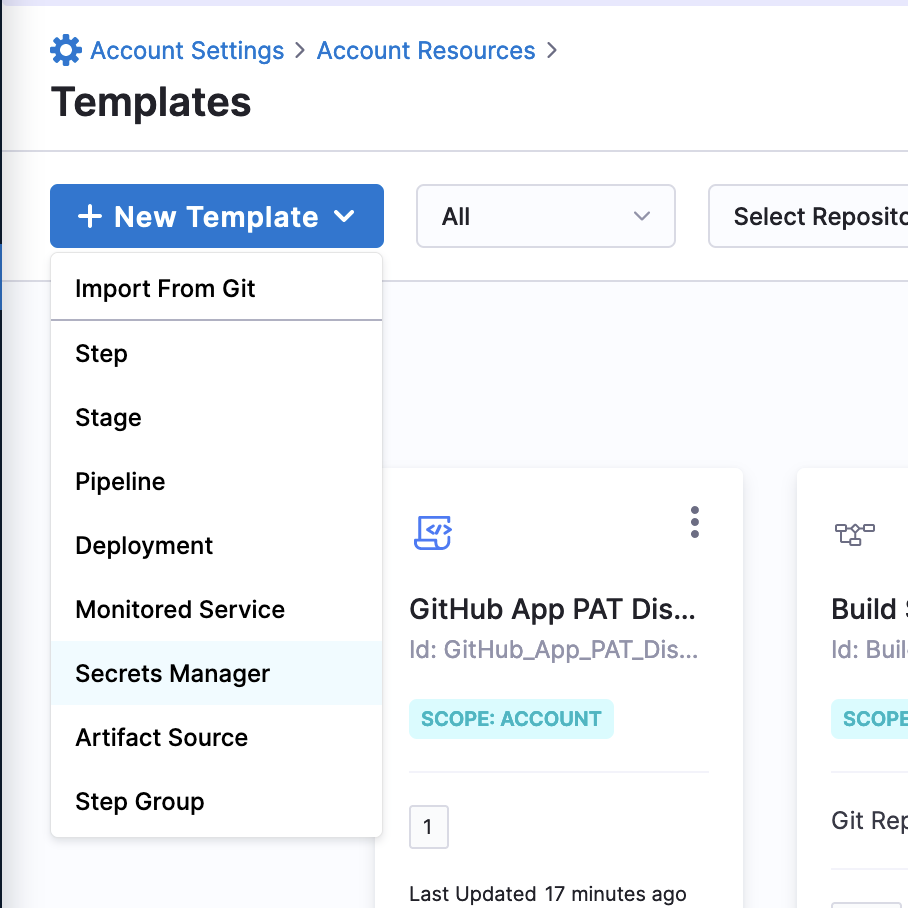
Select New Template, and then select Secrets Manager.

-
For Name, enter
GitHub App PAT Dispenseror another recognizable name. -
For Version Label, enter
1. -
Select Start.
-
Switch to the YAML editor using the toggle at the top of the template page.
-
Edit the YAML and append the following to the existing YAML:
  spec:
    shell: Bash
    delegateSelectors: []
    source:
      type: Inline
      spec:
        script: |-
          set -o pipefail

          app_id=<+secretManager.environmentVariables.app_id>
          pem="
          <+secretManager.environmentVariables.github_app_private_key>
          "

          now=$(date +%s)
          iat=$((${now} - 60)) # Issues 60 seconds in the past
          exp=$((${now} + 600)) # Expires 10 minutes in the future

          b64enc() { openssl base64 | tr -d '=' | tr '/+' '_-' | tr -d '\n'; }

          header_json='{
              "typ":"JWT",
              "alg":"RS256"
          }'
          # Header encode
          header=$( echo -n "${header_json}" | b64enc )

          payload_json='{
              "iat":'"${iat}"',
              "exp":'"${exp}"',
              "iss":'"${app_id}"'
          }'
          # Payload encode
          payload=$( echo -n "${payload_json}" | b64enc )

          # Signature
          header_payload="${header}"."${payload}"
          signature=$(
              openssl dgst -sha256 -sign <(echo -n "${pem}") \
              <(echo -n "${header_payload}") | b64enc
          )

          # Create JWT
          JWT="${header_payload}"."${signature}"


          export PAT=$(curl --request POST \
          --url "https://api.github.com/app/installations/<+secretManager.environmentVariables.installation_id>/access_tokens" \
          --header "Accept: application/vnd.github+json" \
          --header "Authorization: Bearer $JWT" \
          --header "X-GitHub-Api-Version: 2022-11-28"|grep token|cut -d'"' -f4)

          # Export PAT as secret
          secret="$PAT"
    environmentVariables:
      - name: installation_id
        type: String
        value: <+input>
      - name: app_id
        type: String
        value: <+input>
      - name: github_app_private_key
        type: String
        value: <+input>
    outputVariables: []
    outputAlias:
      key: PAT
      scope: Pipeline
    onDelegate: true
On line 57, the script uses grep token|cut -d'"' -f4 to extract the PAT from the payload returned by GitHub. This is because JQ is not included with the default Harness delegate image.
If you installed jq on your delegate, replace the grep command with jq '.token'.
Add a custom secrets manager connector
Next, use the template to add a custom secret manager connector.
You can create this at the account level to give the access granted by this GitHub App to all projects in your Harness account, or you can create it at the org or project level to restrict the connector's access to a specific org/projects.
-
Go to your Harness Account Settings and select Connectors under Account Resources.
-
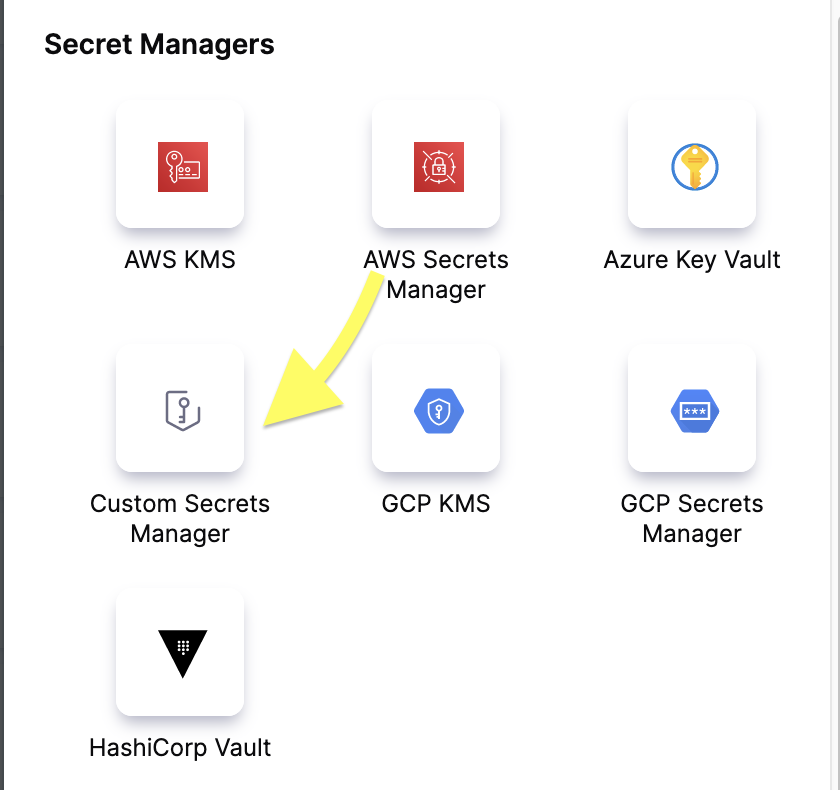
Select New Connector, and then select Custom Secrets Manager under Secrets Managers.

-
For Name, enter
GitHub App Pat Dispenseror a similar recognizable name, and then select Continue. -
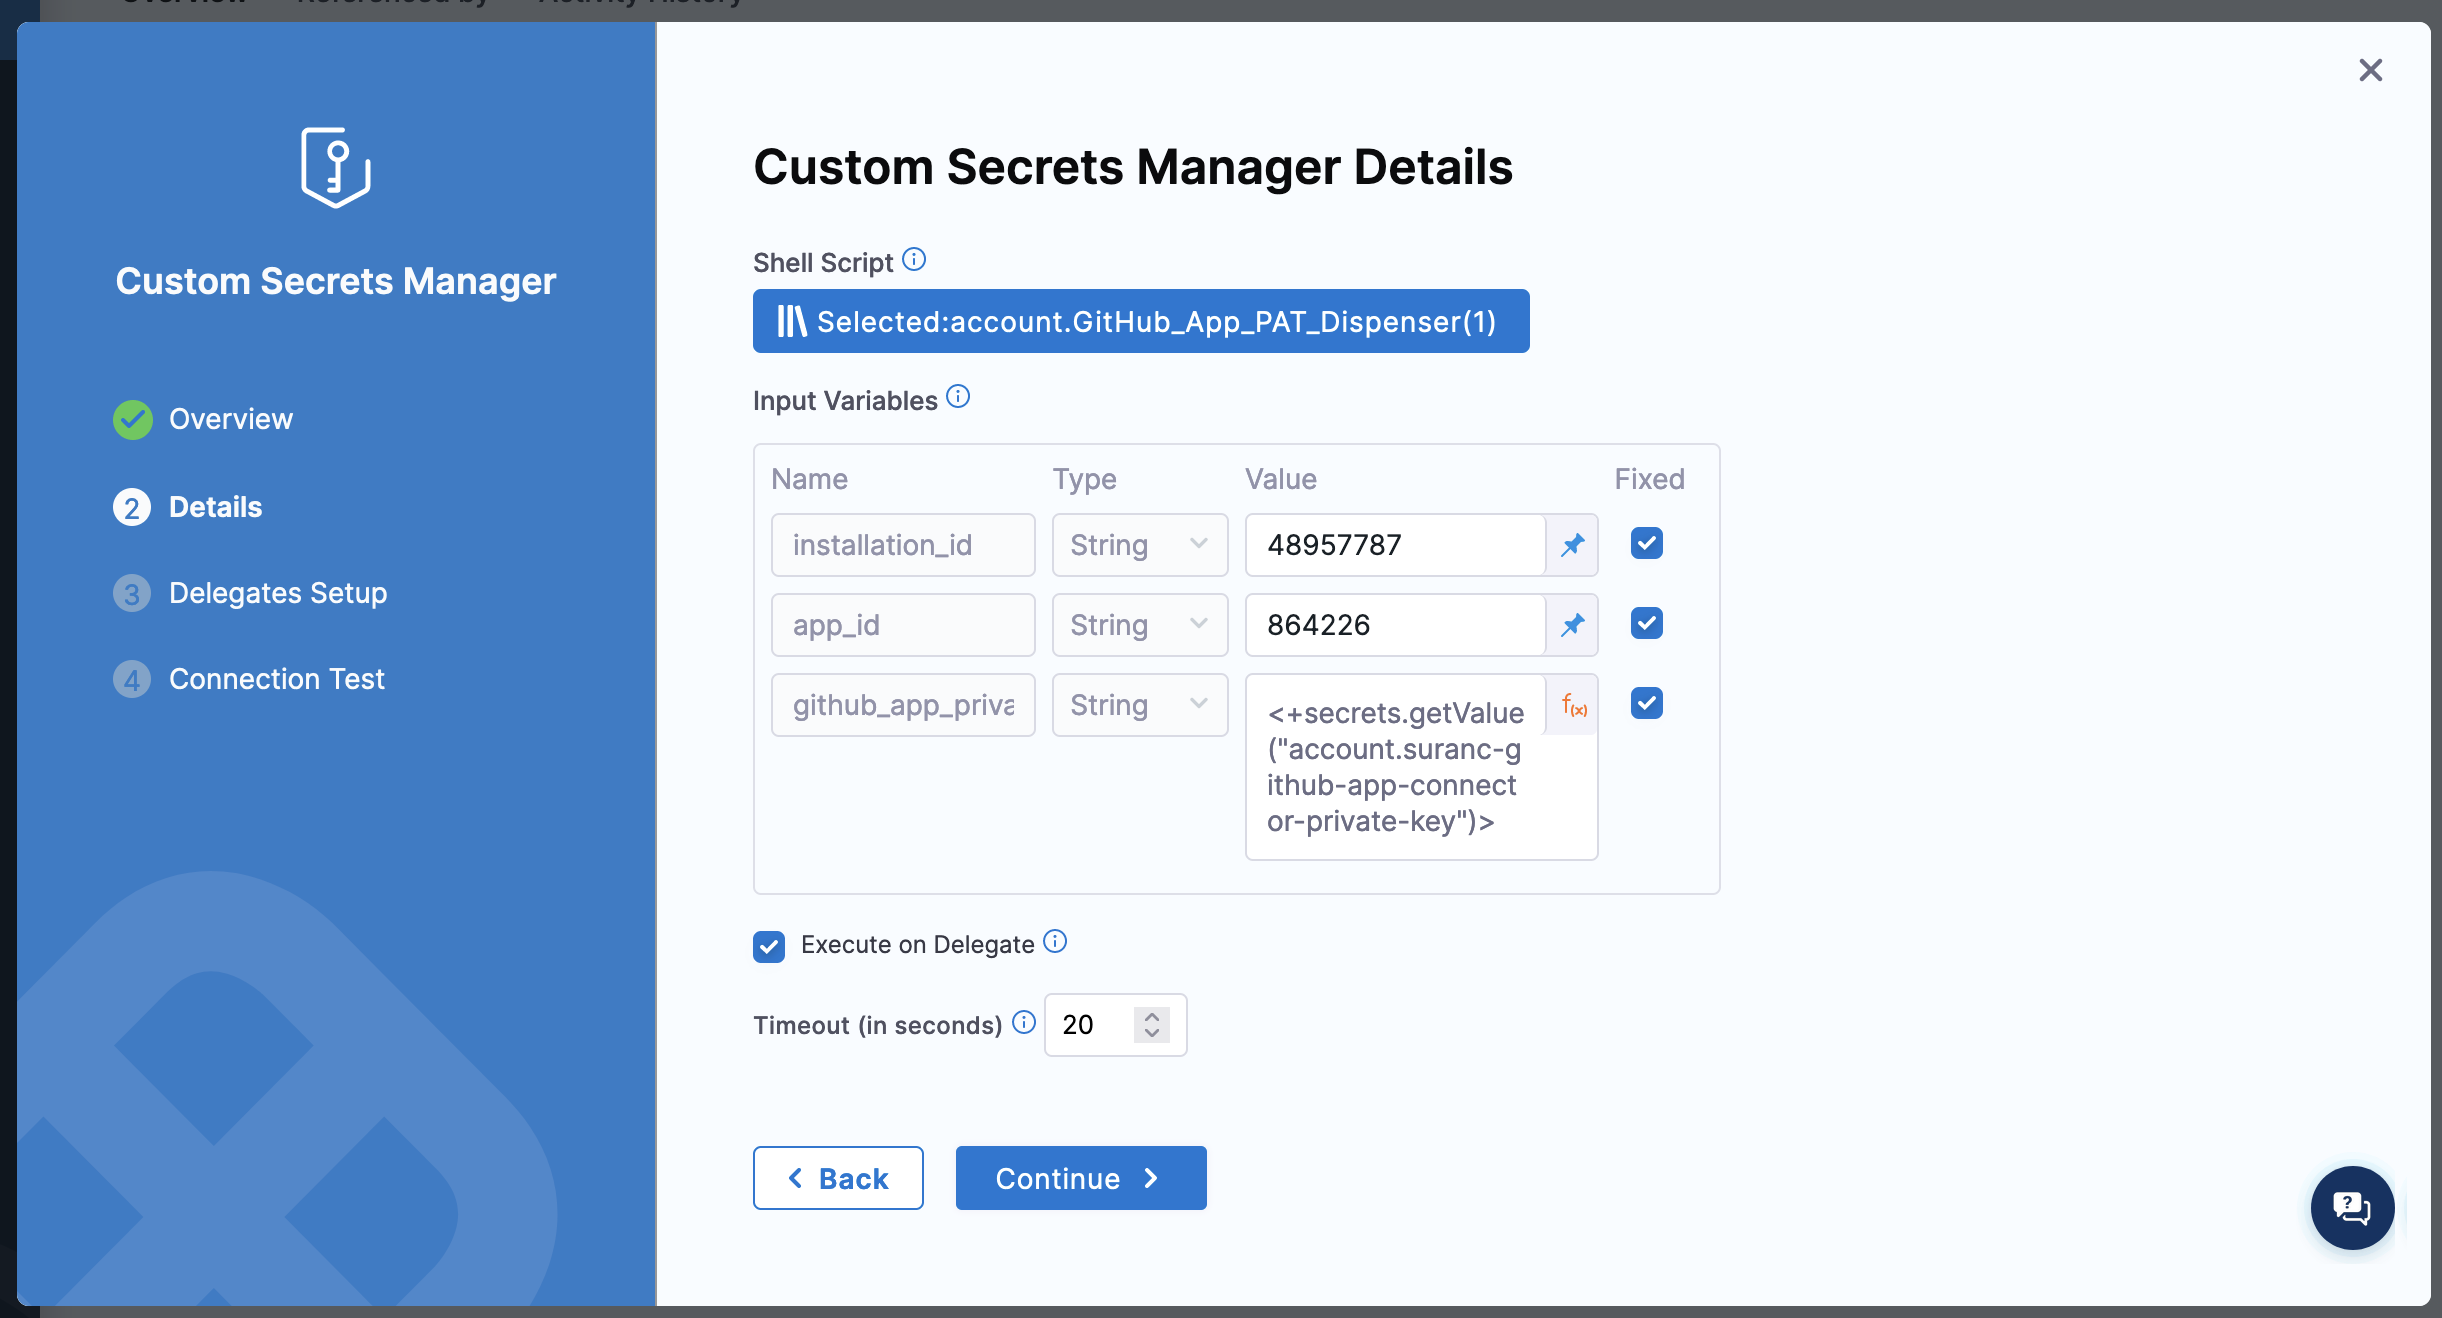
For Shell Script, select Select Template, select your custom secrets manager template that you created previously, and then select Use template.
-
For each Input Variable, select the function icon and change the input type to Fixed Value. Then, enter the appropriate value:
installation_id- GitHub App installation IDapp_id- GitHub App IDgithub_app_private_key- An expressions referencing a Harness file secret containing the GitHub App's private key.

-
Select Continue, modify the delegate configuration if desired, and then select Save and Continue. If the connection test succeed, select Finish.
Here's a YAML example for the custom secrets manager connector:
connector:
  name: GitHub App PAT Dispenser
  identifier: GitHub_App_PAT_Dispenser
  description: ""
  accountIdentifier: 1234
  type: CustomSecretManager
  spec:
    onDelegate: true
    template:
      templateRef: account.GitHub_App_PAT_Dispenser
      versionLabel: "1"
      templateInputs:
        environmentVariables:
          - name: installation_id
            value: "12341234"
            type: String
            useAsDefault: true
          - name: app_id
            value: "12345"
            type: String
            useAsDefault: true
          - name: github_app_private_key
            value: <+secrets.getValue("account.github-app-connector-private-key")>
            type: String
            useAsDefault: true
    timeout: 20
    default: false
Create a secret with the custom secrets manager
Now, you can create a text secret to use in your CI pipeline that generates a dynamic token you can use to perform Git operations or interact with the GitHub API using the GitHub App to authenticate.
-
Go to Account Settings and select Secrets under Account Resources.
-
Select New Secret, and then select Text.
-
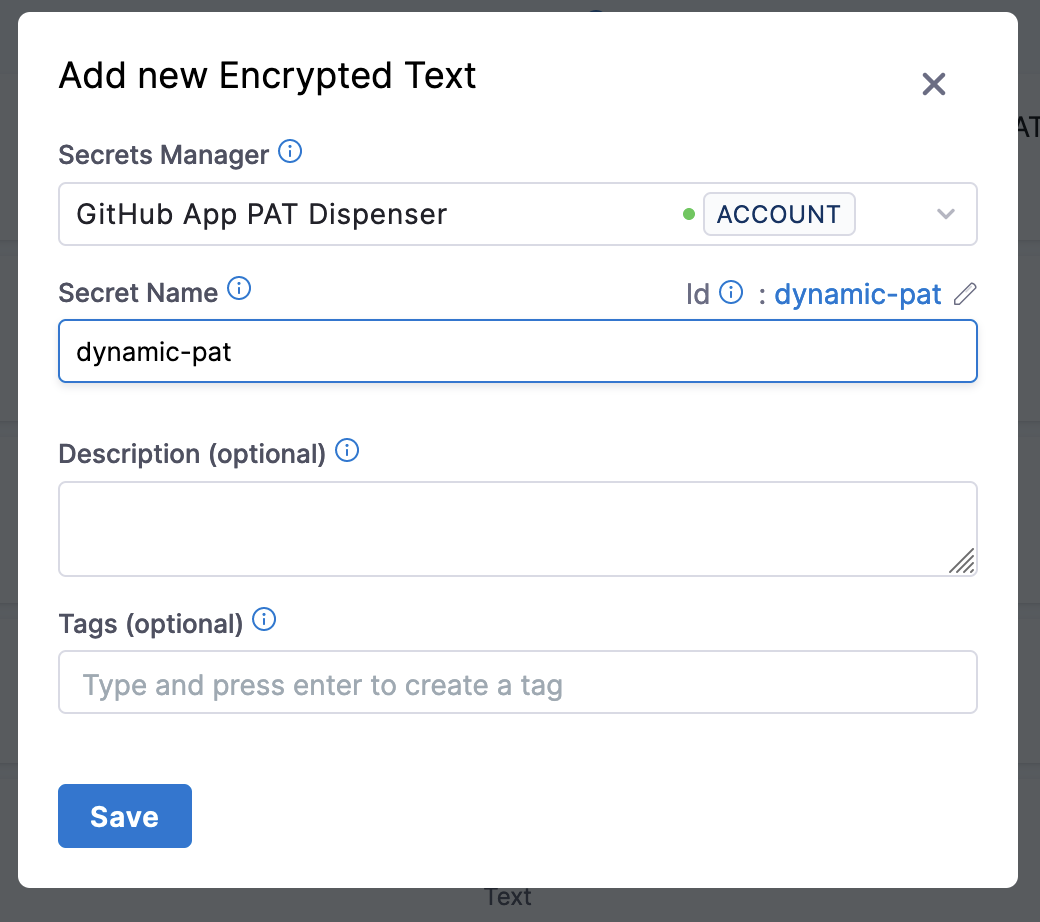
For Secrets Manager, select your GitHub App custom secrets manager connector.
-
For Secret Name, enter
dynamic-pator another recognizable name, and then select Save.
Use the dynamic token in a pipeline for Git authentication
Finally, you can use dynamic-pat secret to authenticate Git commands or GitHub API calls in a Run step. Use an expression to reference the secret, such as <+secrets.getValue("dynamic-pat")>
For example, this script sets up the pipelines default codebase with authentication using the dynamic token:
git config --global --add safe.directory /harness
git config --global user.email "your-email@your-domain.com"
git config --global user.name "Your Name"
origin_url=$(git remote get-url origin)
auth_url=$(echo "$origin_url" | sed 's/github.com/git:<+secrets.getValue("dynamic-pat")>@github.com/')
git remote set-url origin "$auth_url"
With this authentication in place, you can use the same Run step or sequential Run steps to run commands that commit and push changes to your repo.