Create and run chaos experiments
Harness Chaos Engineering (HCE) gives you the flexibility to create elaborate chaos experiments that help create complex, real-life failure scenarios against which you can validate your applications. At the same time, the chaos experiments are declarative and you can construct them using the Chaos Studio user interface with no programmatic intervention.
A chaos experiment is composed of chaos faults that are arranged in a specific order to create a failure scenario. The chaos faults target various aspects of an application, including the constituent microservices and underlying infrastructure. You can tune the parameters associated with these faults to impart the desired chaos behavior.
For more information, go to flow of control in a chaos experiment.
Construct a chaos experiment
To add a chaos experiment:
-
In Harness, navigate to Chaos > Chaos Experiments. Select + New Experiment.

-
In the Experiment Overview, enter the experiment Name and optional Description and Tags. In Select a Chaos Infrastructure, select the infrastructure where the target resources reside, and then click Next.
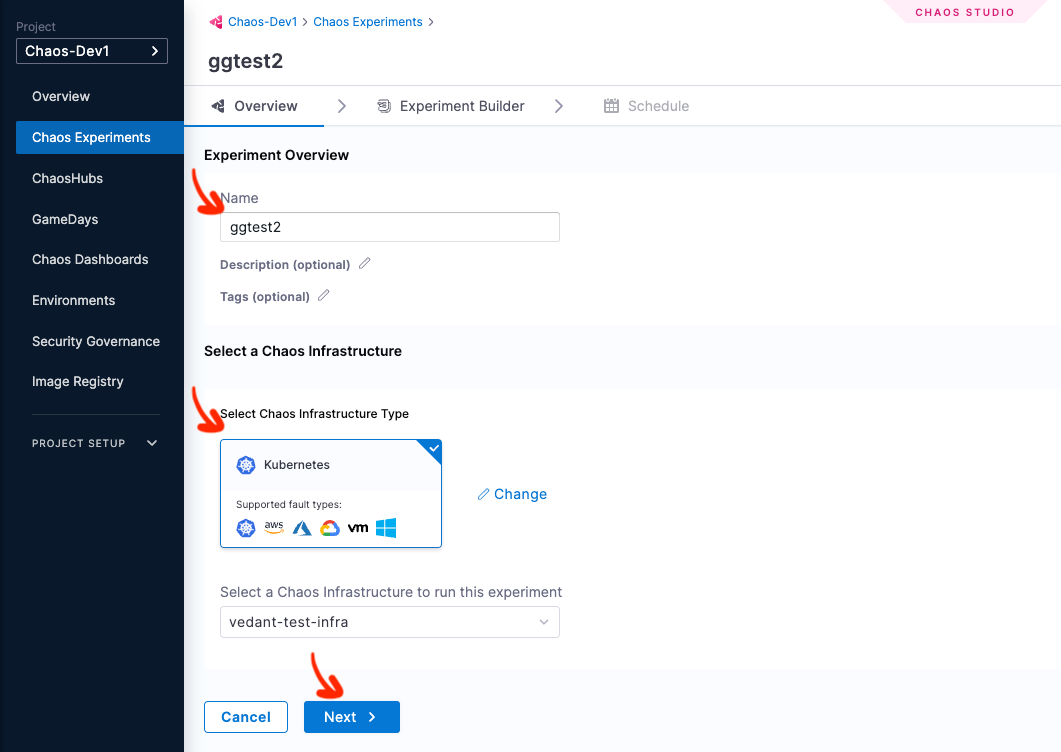
For more information on infrastructure, go to Connect chaos infrastructures.
-
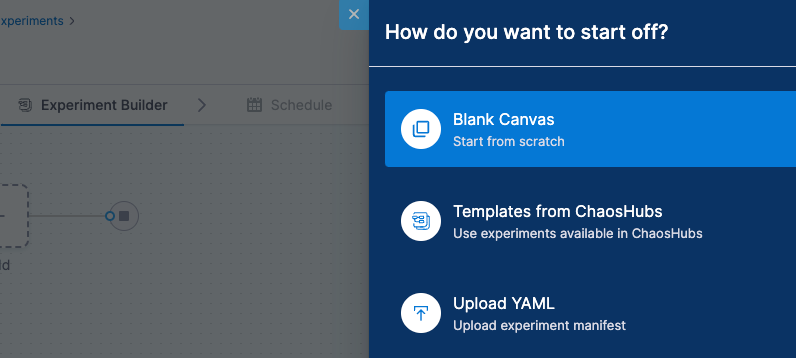
This takes you to the Experiment Builder tab, where you can choose how to start building your experiment.
-
Select how you want to build the experiment. The options, explained later, are:
- Blank Canvas - Lets you build the experiment from scratch, adding the specific faults you want.
- Templates from ChaosHubs - Lets you preview and select and experiment from pre-curated experiment templates available in ChaosHubs.
- Upload YAML - Lets you upload an experiment manifest YAML file.
These options are explained below.
Using blank canvas
-
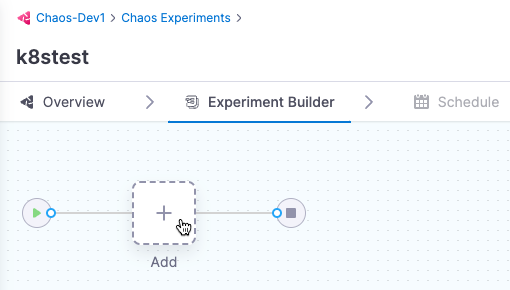
The Experiment Builder tab is displayed. Click Add to add a fault to the experiment
-
Select the fault you want to add to the experiment individually.
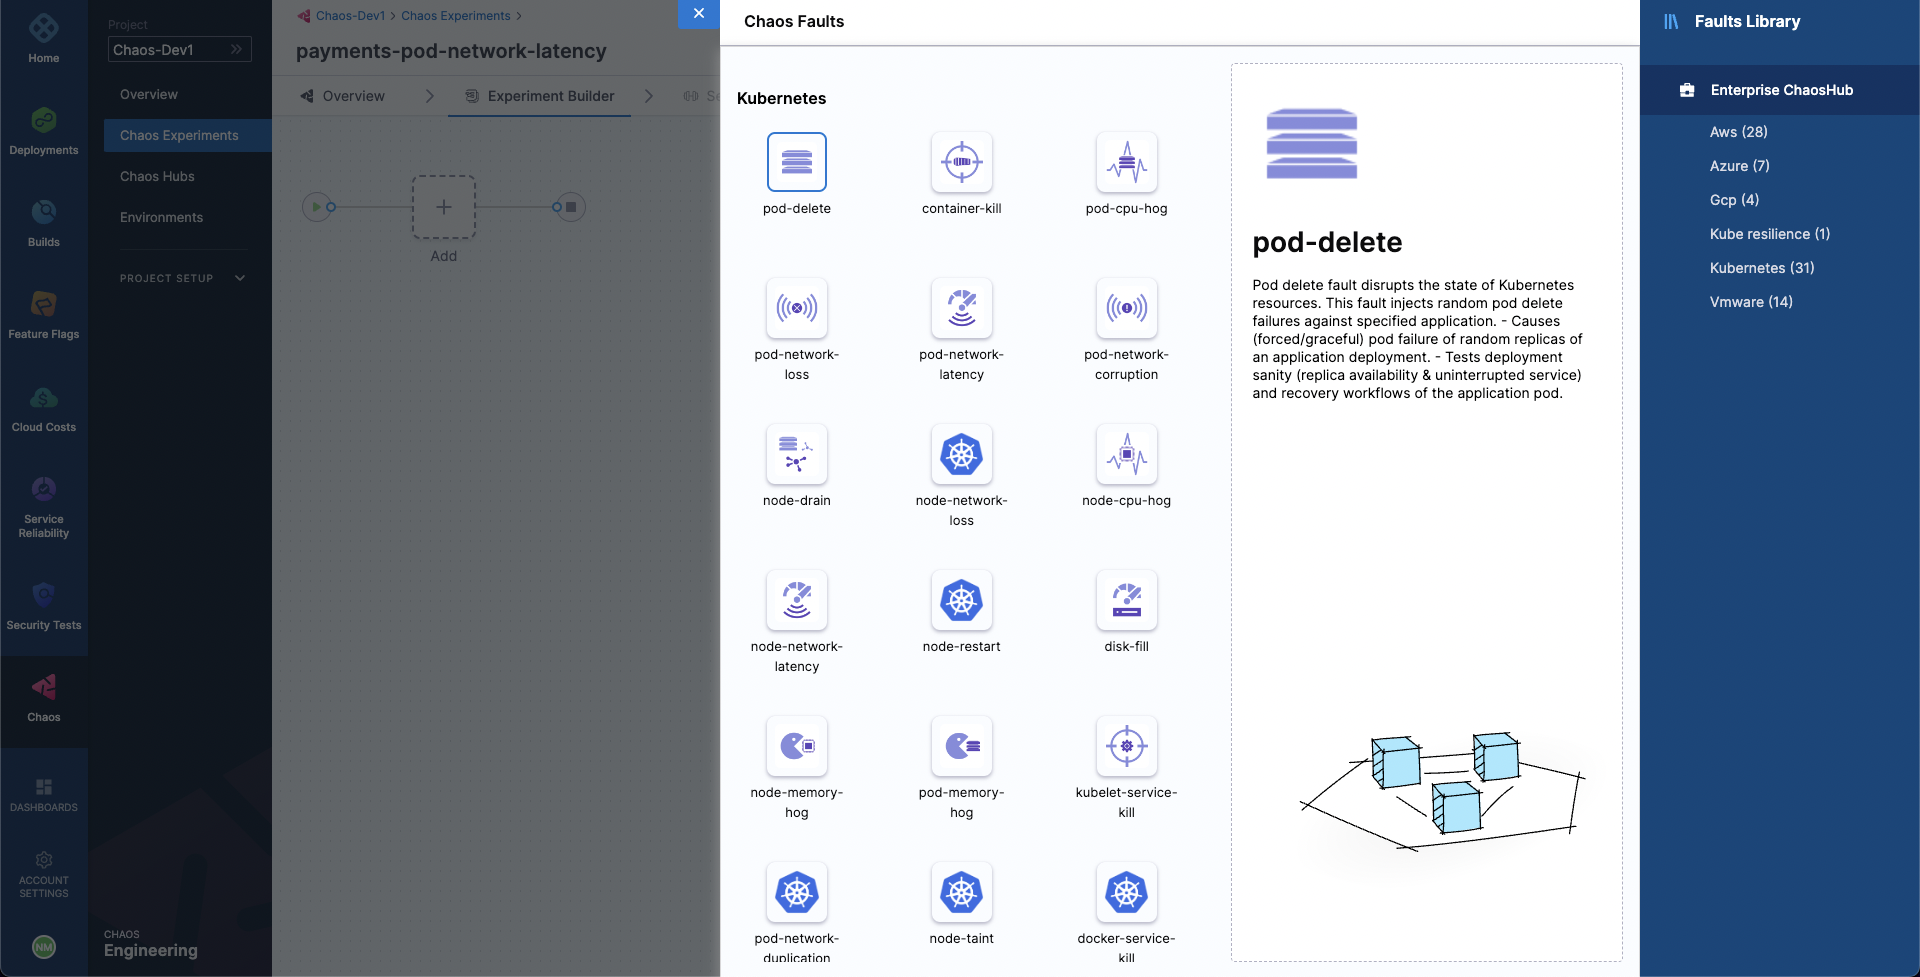
-
For each fault you select, tune the fault's properties. Properties will be different for different faults.
-
To tune each fault:
-
Specify the target application (only for pod-level Kubernetes faults): This lets the application's corresponding pods be targeted.
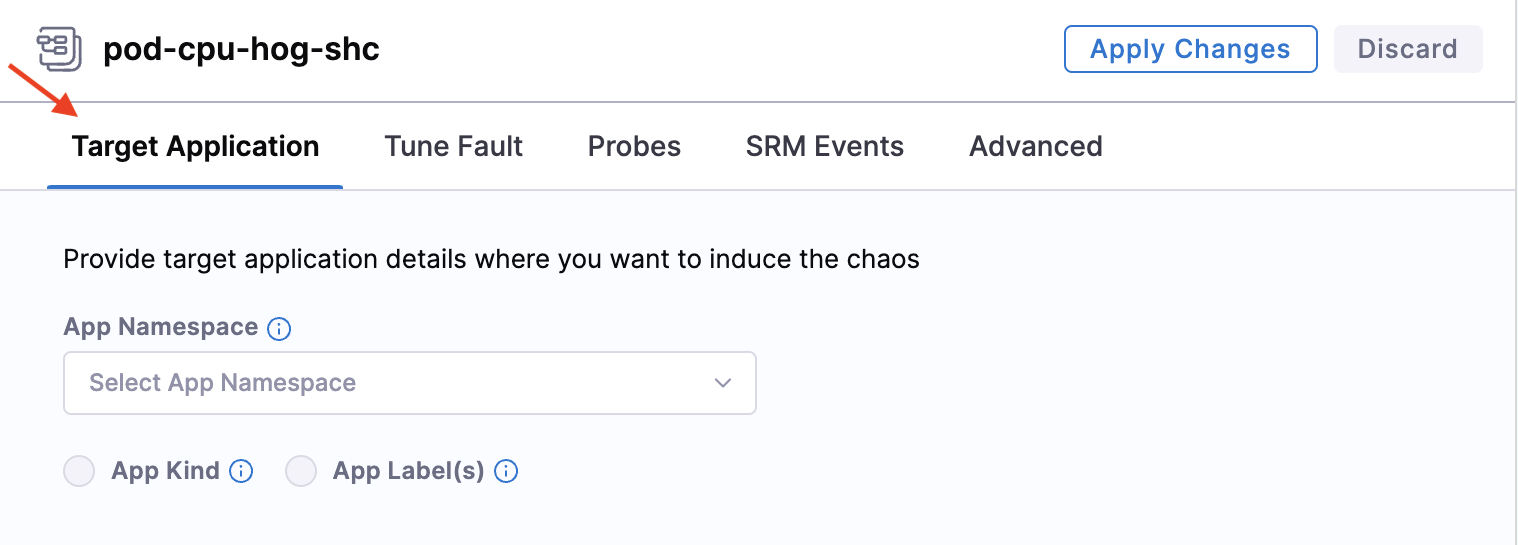
-
Tune fault parameters: Every fault has a set of common parameters, such as the chaos duration, ramp time, etc., and a set of unique parameters that may be customised as needed.
-
Add chaos probes: (Optional) On the Probes tab, you can add chaos probes to automate the chaos hypothesis checks for a fault during the experiment execution. Probes are declarative checks that aid in the validation of certain criteria that are deemed necessary to declare an experiment as passed.
-
Tune fault weightage: Set the weight for the fault, which sets the importance of the fault relative to the other faults in the experiments. This is used to calculate the resilience score of the experiment.
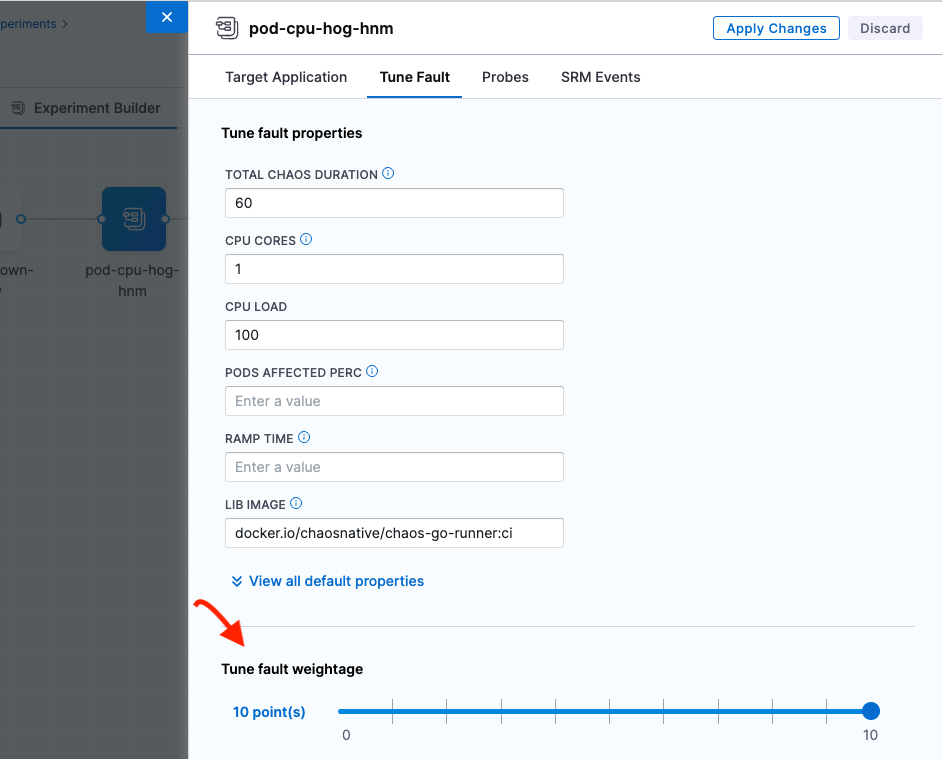
-
-
Using templates from ChaosHubs
-
Select an experiment template from a ChaosHub.
-
Select Experiment Type to see available ChaosHubs to select templates from.
-
Select a template to see a preview of the faults included.
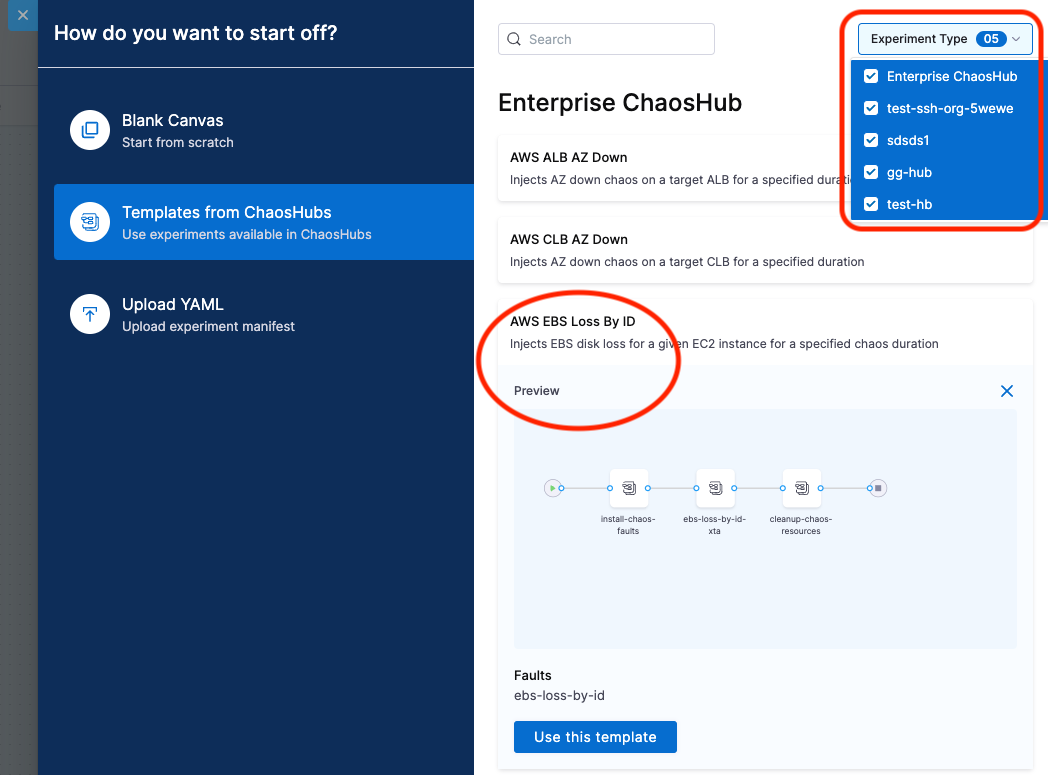
-
You can edit the template to add more faults or update the existing faults.
Upload YAML
- Upload an experiment manifest YAML file to create the experiment.
You can edit the experiment to update the existing faults or add more of them.
Construct the chaos fault using one of the three options mentioned earlier and save the experiment.

- Select Save to save the experiment to the Chaos Experiments page. You can add it to a ChaosHub later.
- Select Add Experiment to ChaosHub to save this experiment as a template in a selected ChaosHub.
Run or schedule the experiment
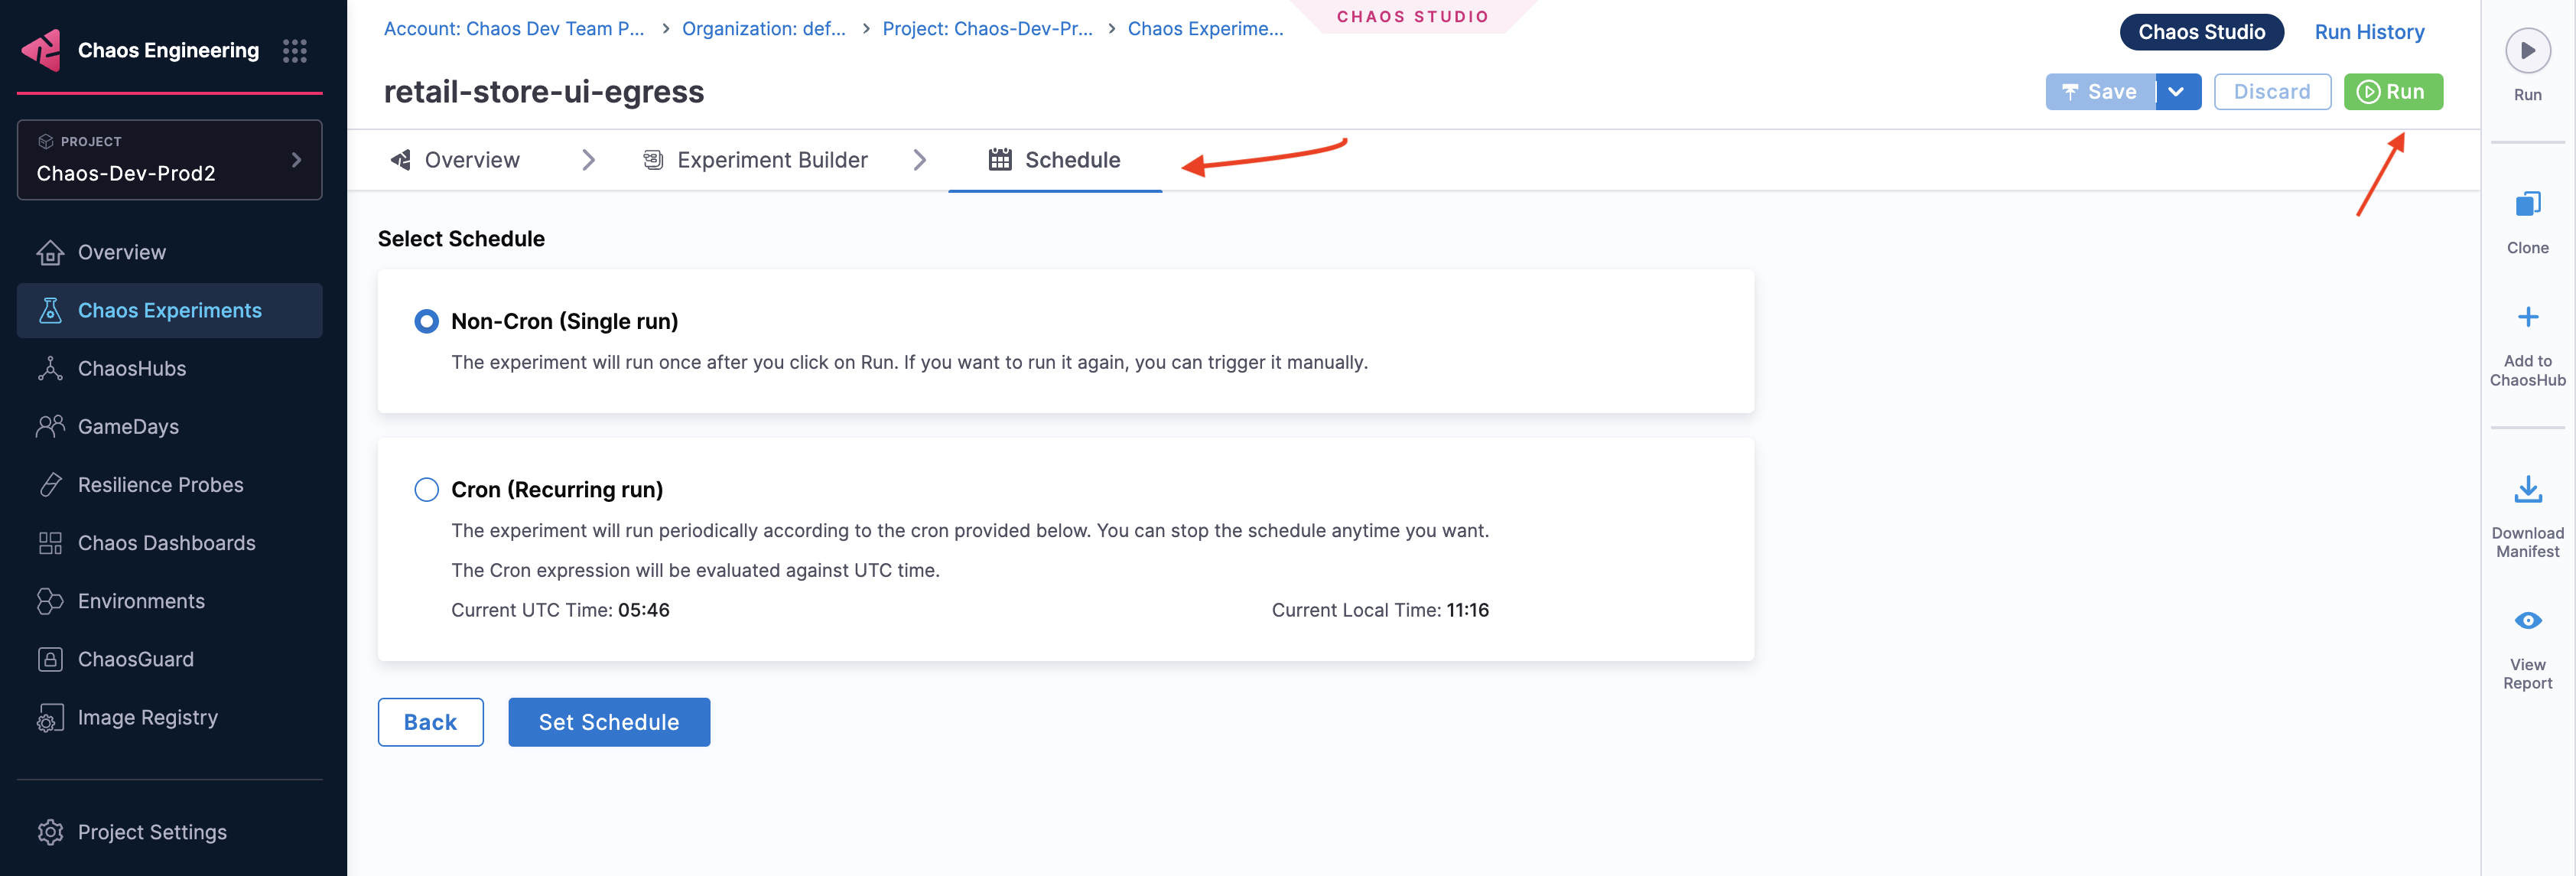
Now, you can choose to either run the experiment right away by selecting the Run button on the top, or select the Schedule tab to create a recurring schedule to run the experiment.
Execute experiment once
Select Non-Cron(Single run) and select Save. Now select Run to execute the experiment.
Execute experiment on a schedule
-
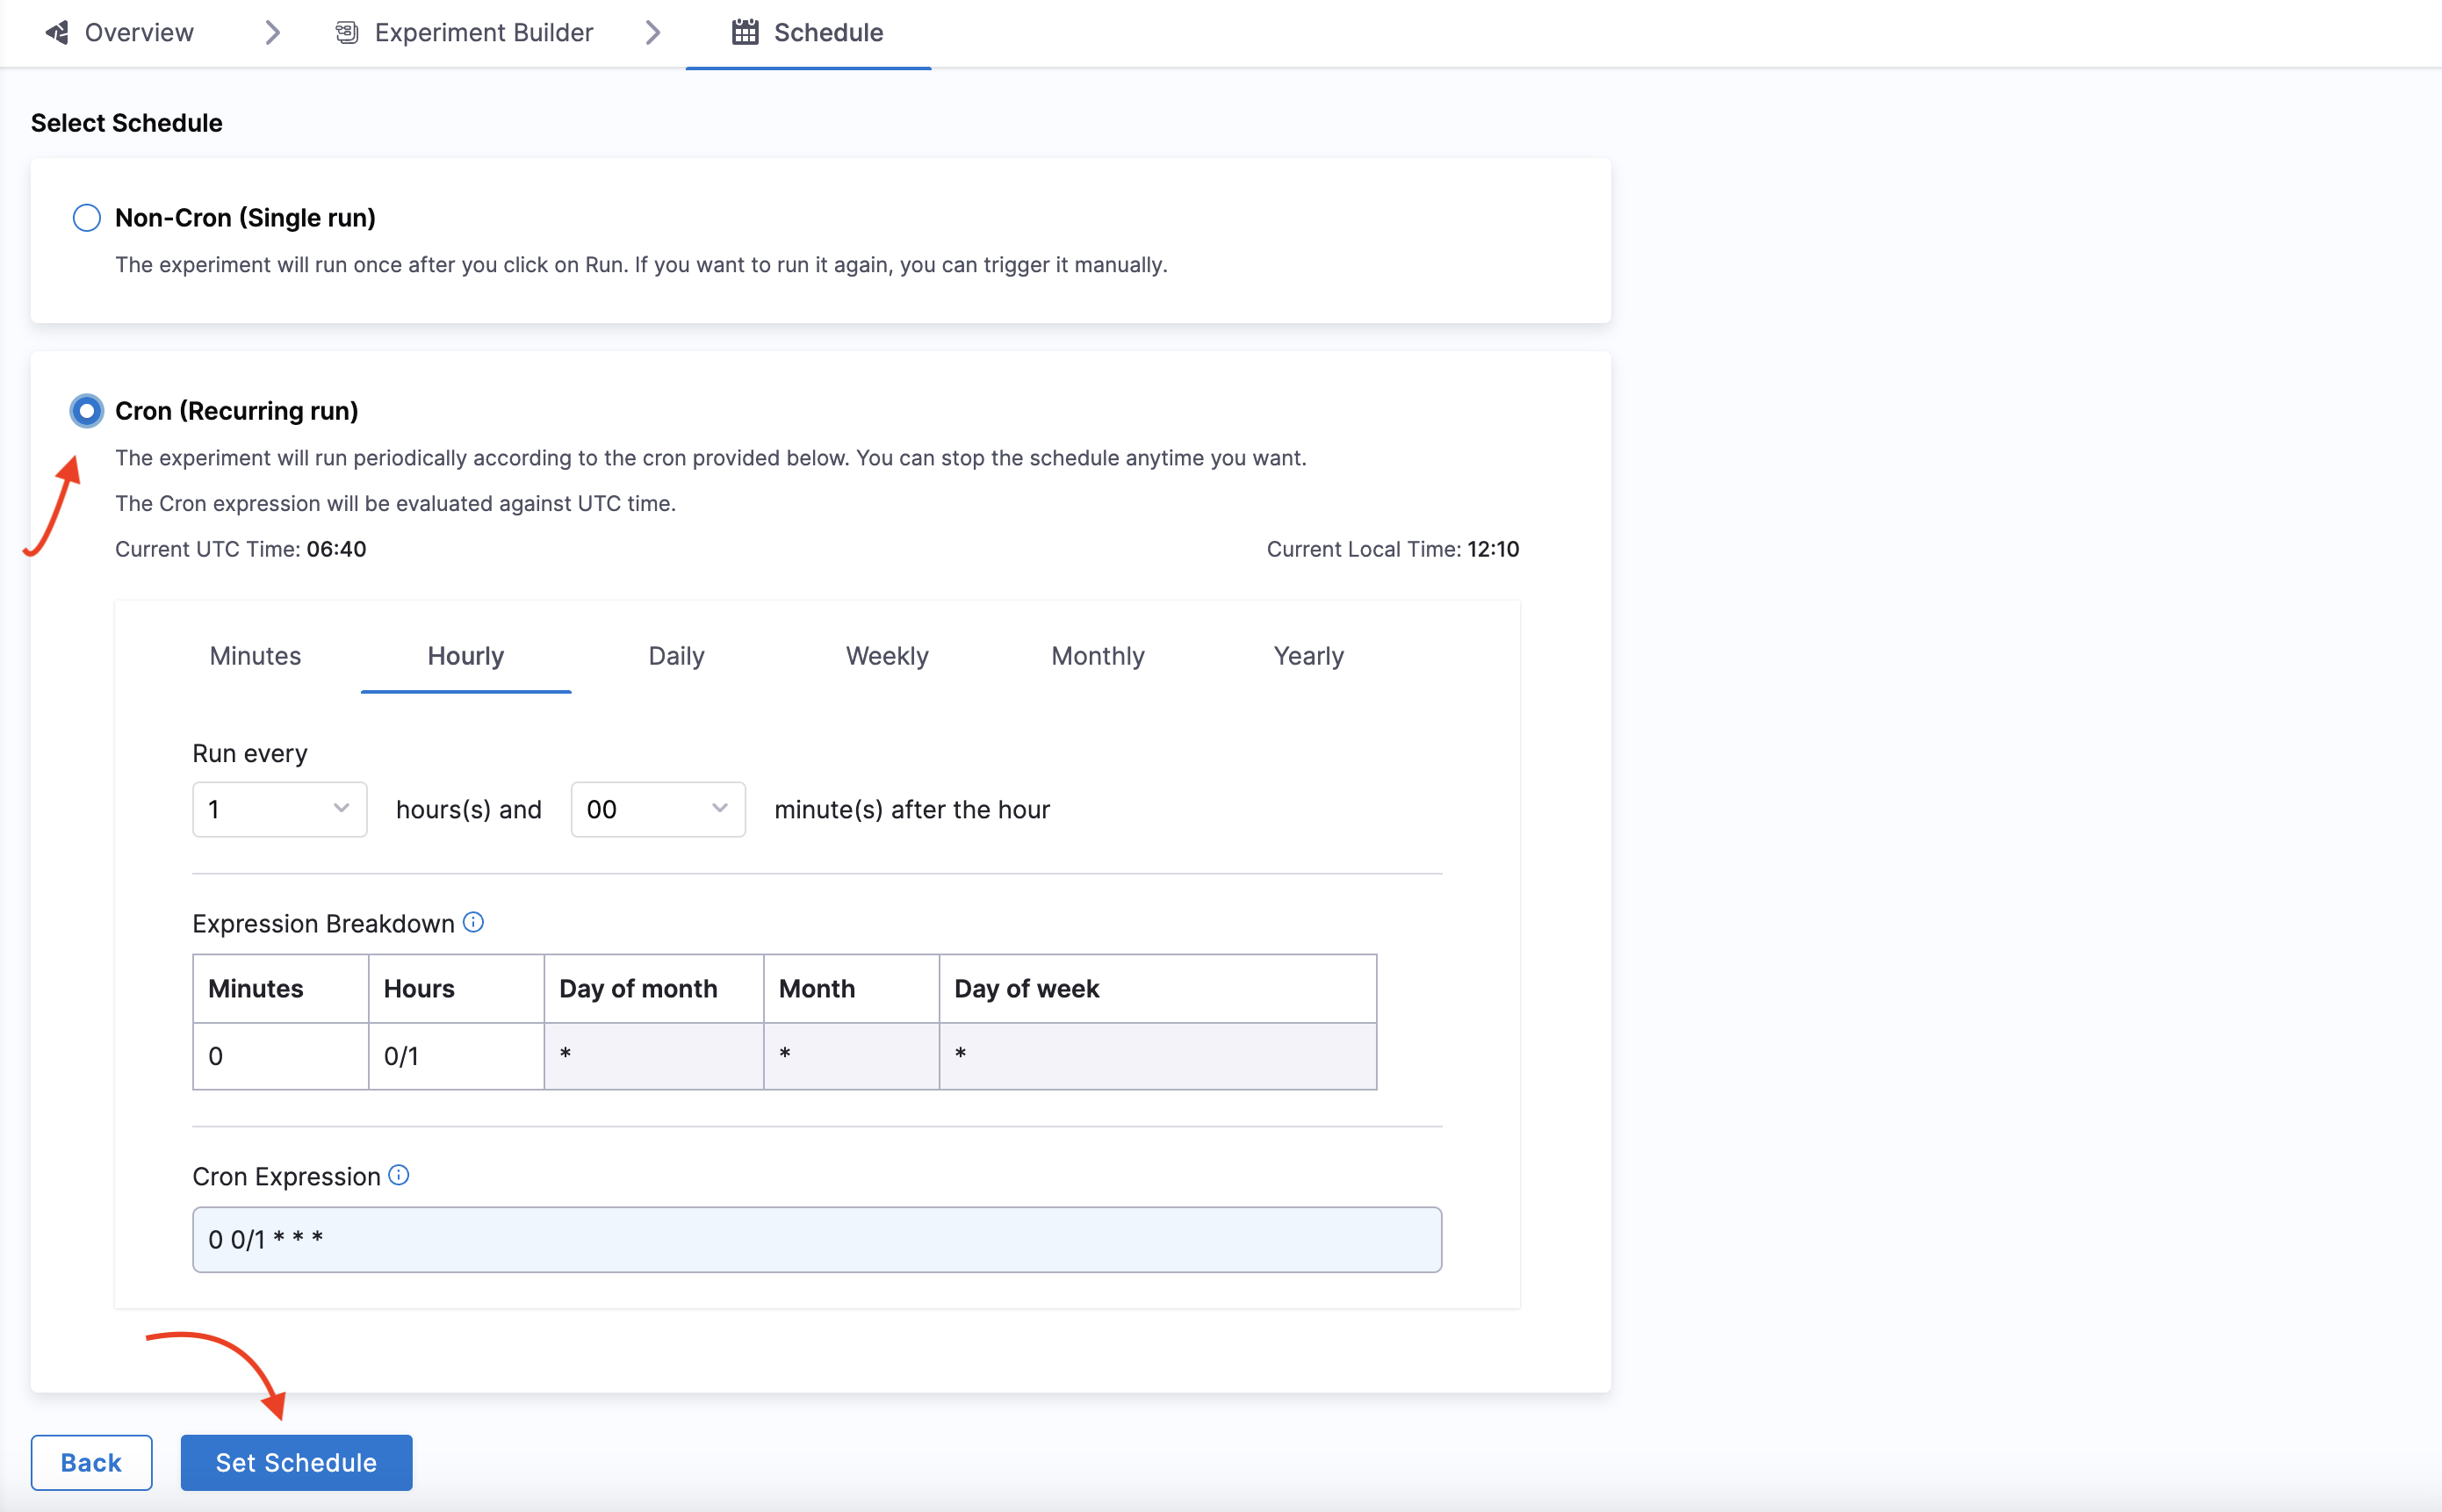
To schedule the experiment run for specific periods, select Cron(Recurring run), enter the values based on what you select among Minutes or Hourly or Daily or Monthly or Yearly. The Cron Expression is automatically generated based on how you schedule to run the experiment.
-
Select Set Schedule.
Advanced experiment setup options
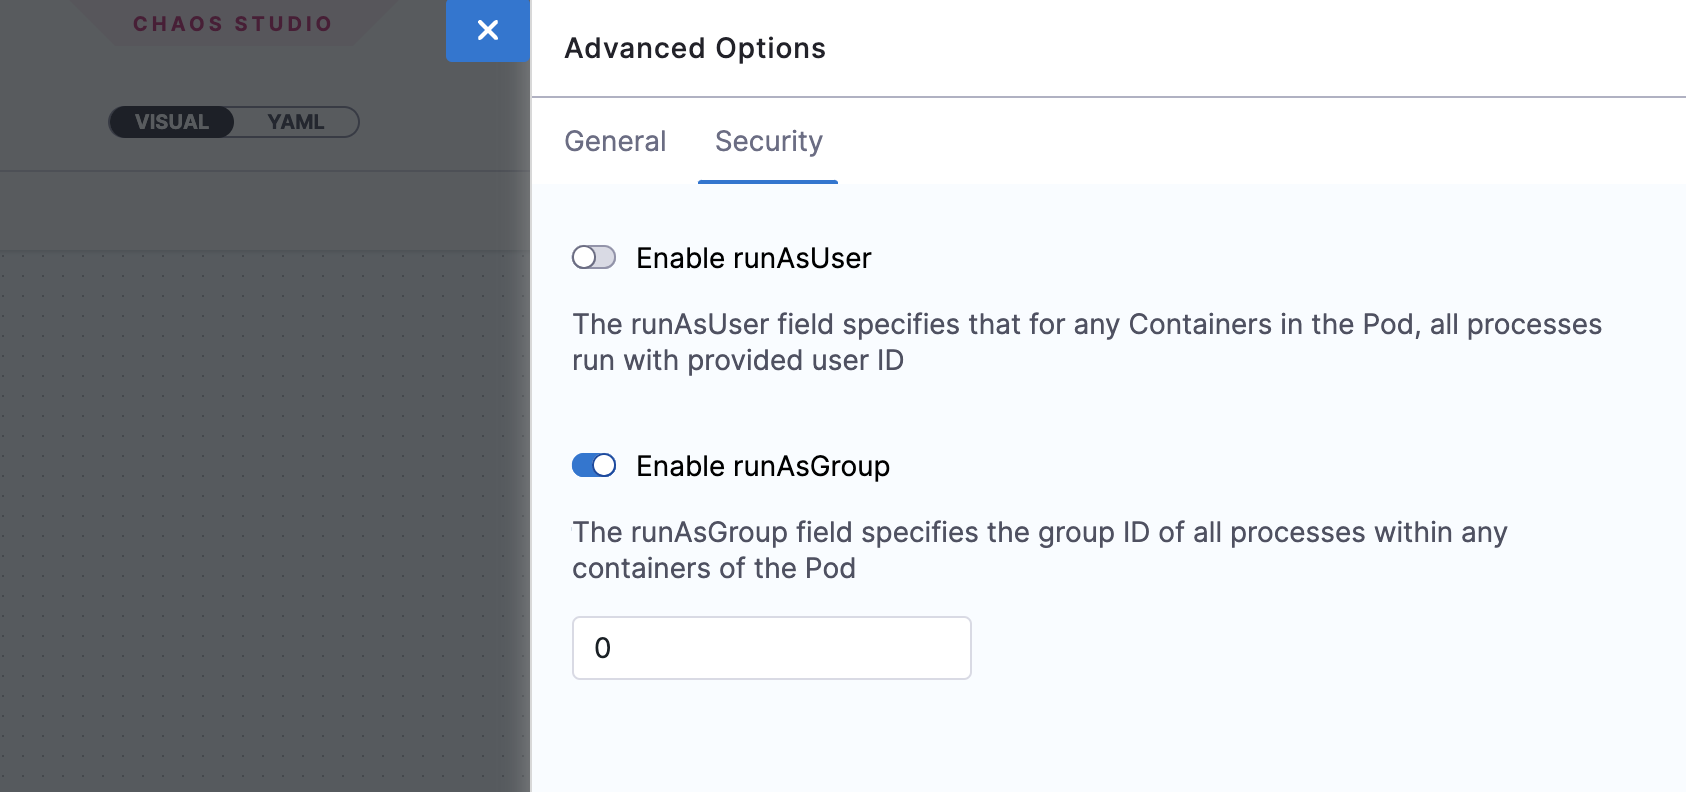
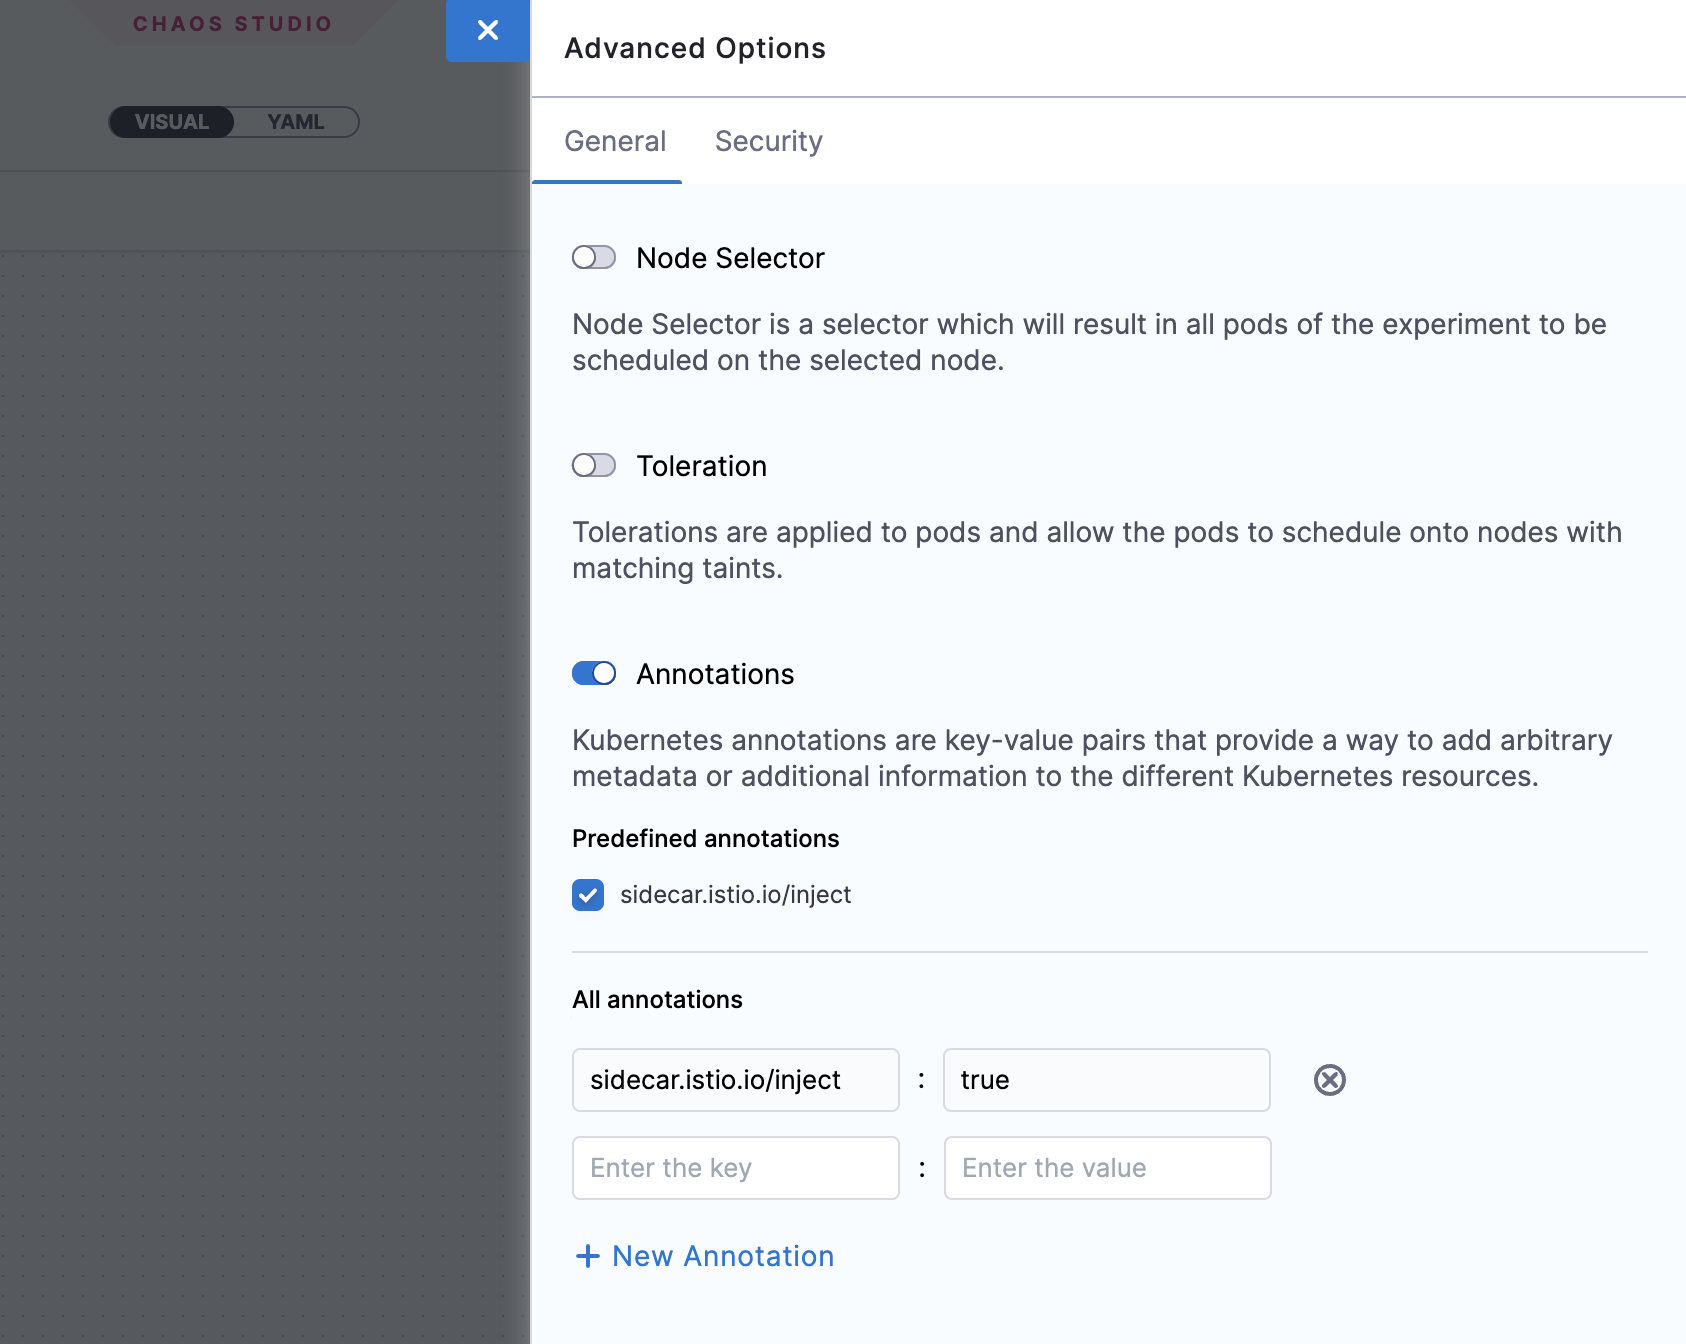
You can select Advanced Options on the Experiment Builder tab to configure the advanced options (described below) while creating an experiment for a Kubernetes chaos infrastructure:

General options
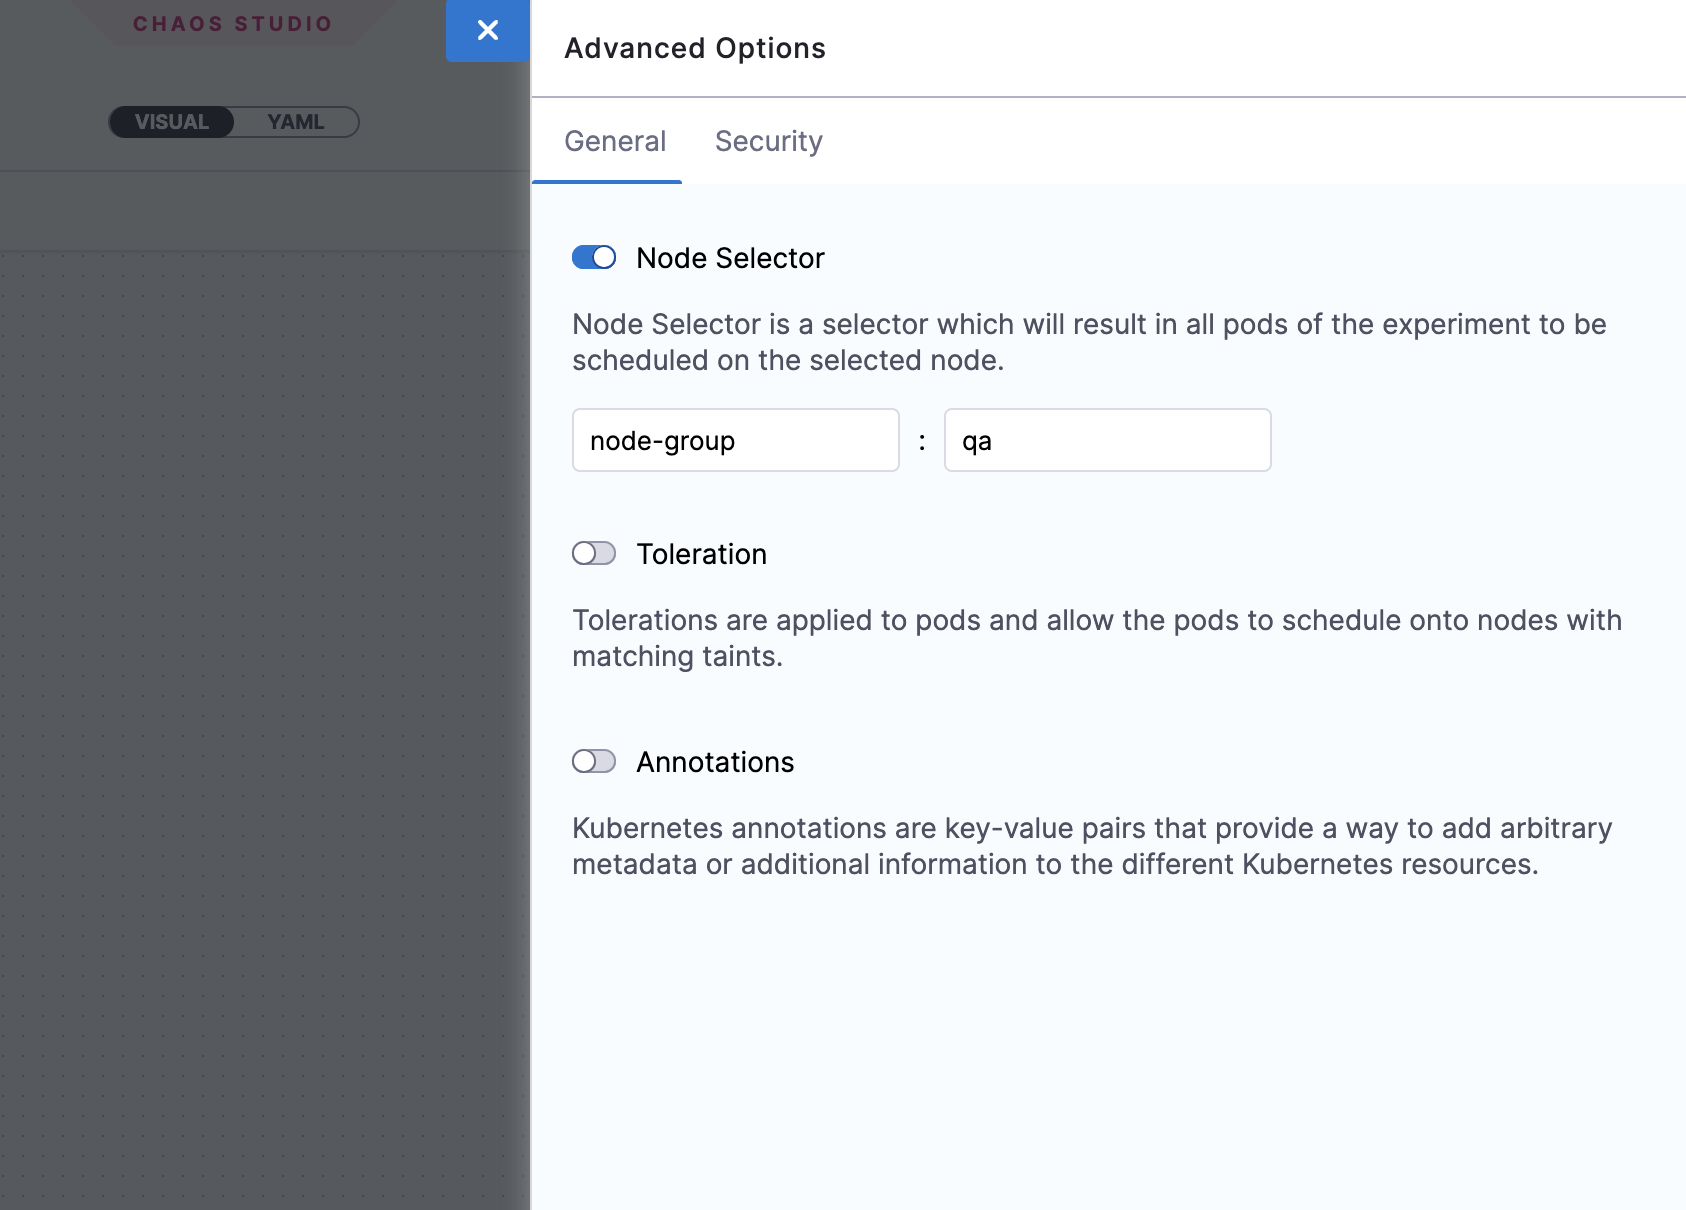
Node Selector
Specifies the node on which the experiment pods will be scheduled. Provide the node label as a key-value pair.
-
Can be used with node-level faults to avoid the scheduling of the experiment pod on the target node(s).
-
Can be used to limit the scheduling of the experiment pods on nodes that have an unsupported OS.
Toleration
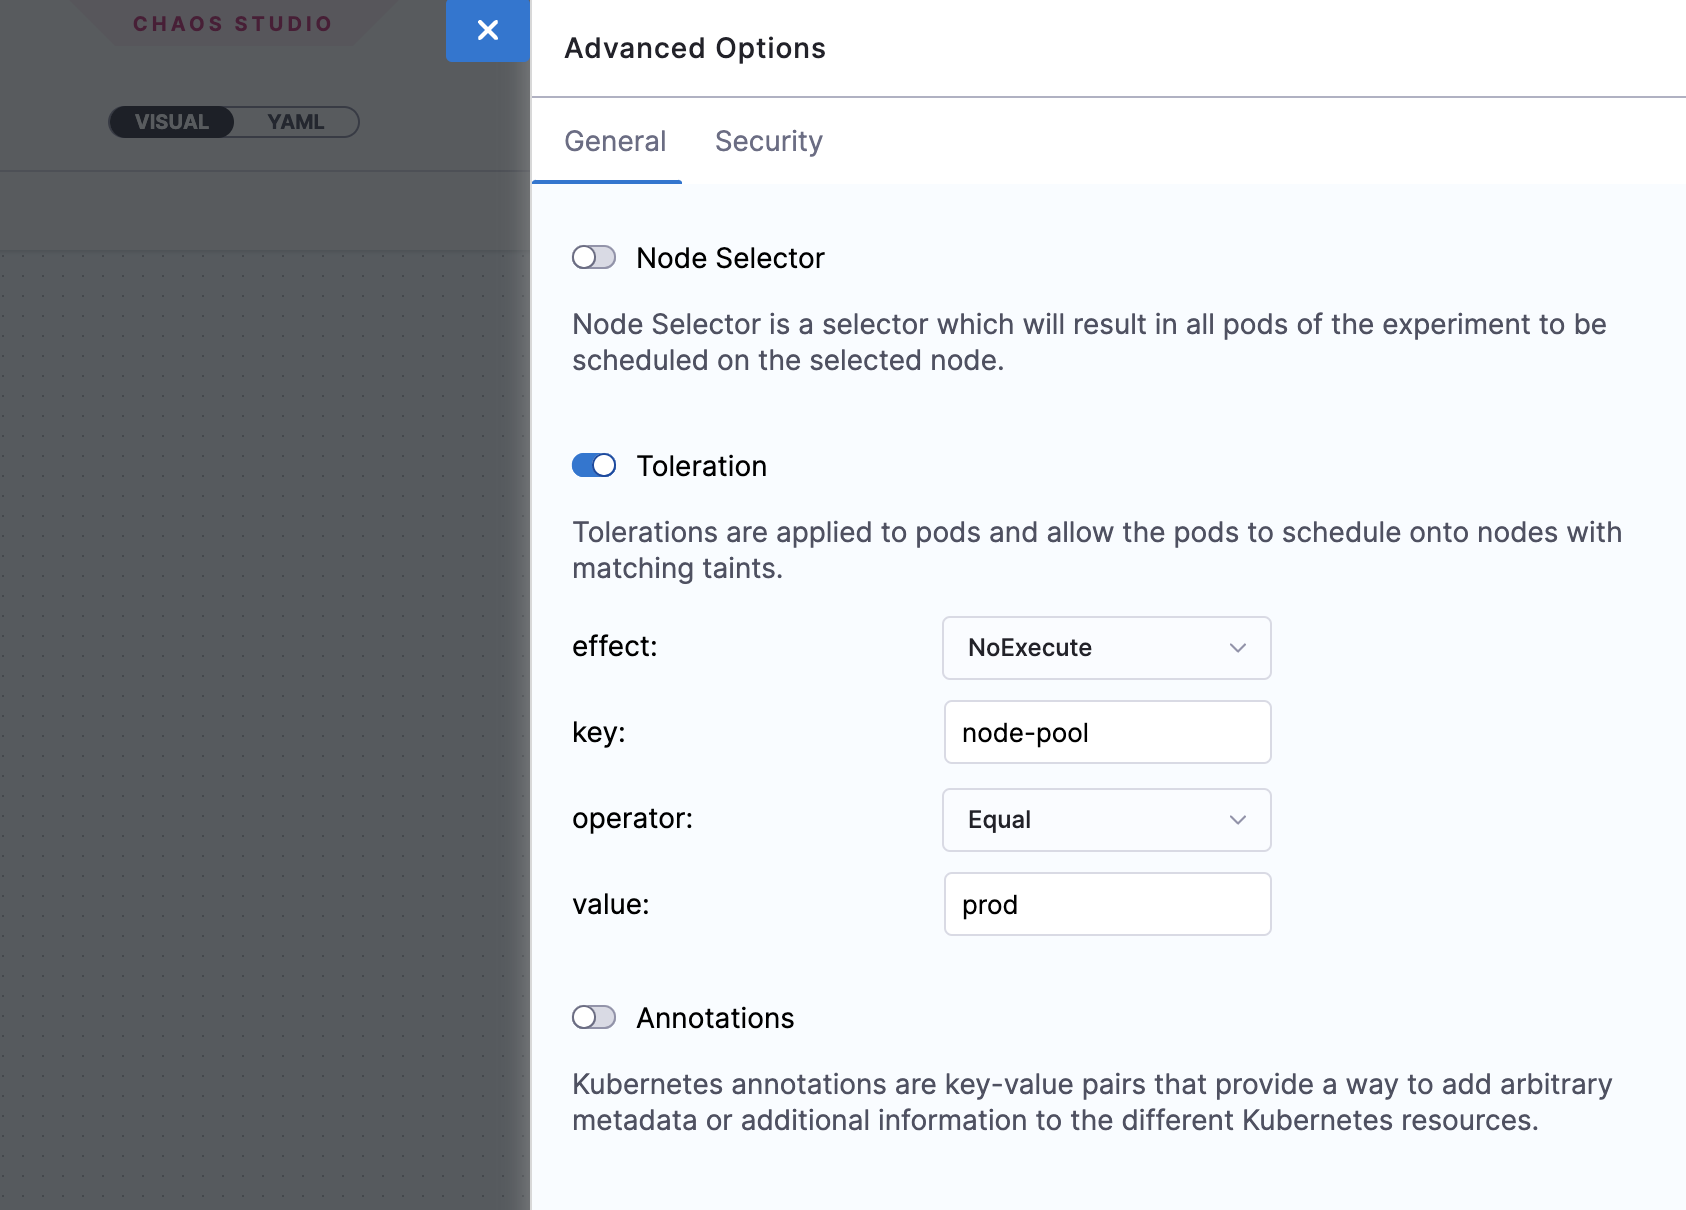
Specifies the tolerations that must be satisfied by a tainted node to be able to schedule the experiment pods. For more information on taints and tolerations, go to the Kubernetes documentation.
-
Can be used with node-level faults to avoid the scheduling of the experiment pod on the target node(s).
-
Can be used to limit the scheduling of the experiment pods on nodes that have an unsupported OS.
Annotations
Specifies the annotations to be added to the experiment pods. Provide the annotations as key-value pairs. For more information on annotations, go to the Kubernetes documentation.
-
Can be used for bypassing network proxies enforced by service mesh tools like Istio.
Security options
Enable runAsUser
Specifies the user ID to be used for starting all the processes in the experiment pod containers. By default 1000 user ID is used.
-
Allows privileged access or restricted access for experiment pods
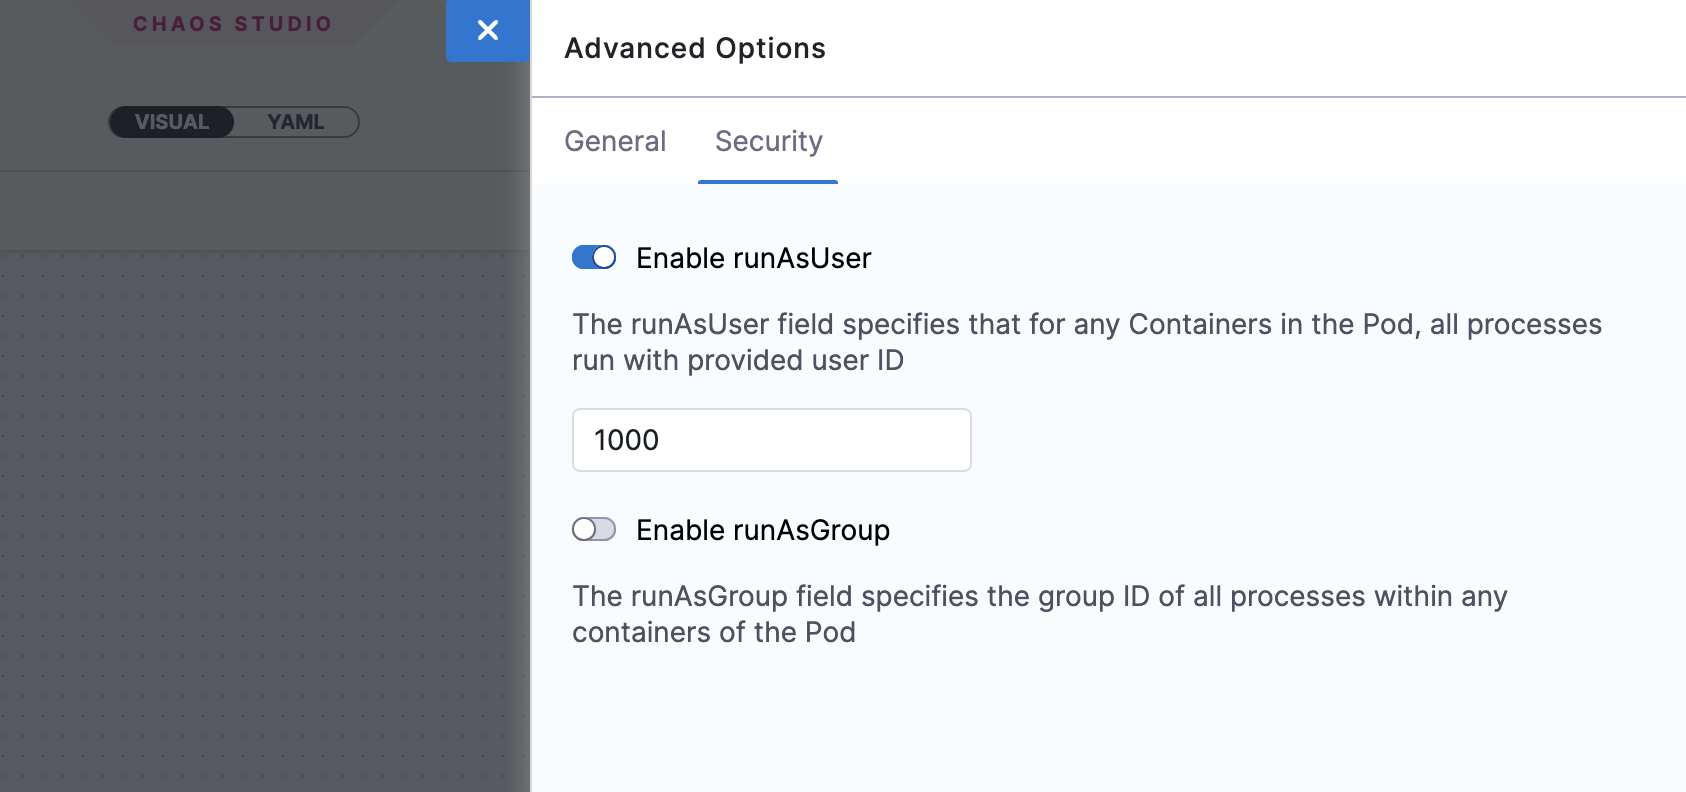
Enable runAsGroup
Specifies the group ID to be used for starting all the processes in the experiment pod containers instead of a user ID.
-
Allows privileged access or restricted access for experiment pods
